Plentiful lighting is one of the most important components of a good interior, and also the one that gets neglected the most. Instead of leaving it out of your decor plans, use it to flaunt your style and creativity.


There are many great DIY options for making your own statement fixture and I totally fell in love with Capiz shell chandeliers. Don’t run away! We are not talking about getting 500 shells, shaping and then stringing them when you can get the same look with wax paper. Yes, wax paper! This stunning piece actually costs less than a hundred rupees! (And that’s less than a dollar here.)
So let’s head straight to the tutorial.
Crafting supplies:
- Wax paper sheets
- All purpose glue
- Scissors (it would be SOOO much easier if you can get your hands on a circle cutter)
- Lamp shade
- Thin wire
Steps:
You would need about 400 circles, each with a 2 inch diameter and strips that are 1.5cm wide and 17 inches long (because metric sounds so better when you’re talking about 1.5cm). This is the dullest and the longest part but once it’s done you’d know it was totally worth the time.

Now add 7 circles to each strip gluing them properly so that they don’t curve.

Fold the remaining strip; this is the part you would glue to the lamp shade later.

Strip the fabric attached to the lampshade and add rims of wire (I used thin copper wire). Curve this thinner wire encircling each vertical wire of the frames so that the rims don’t slip. Fold the free part of the paper strip over each rim and glue it.
This is what it looked like from the inside.
TIP: Hang the lampshade and add the strips starting from the lower most rim.
Fold some paper making a wider strip and glue it to the top to add detail.


Once everything is glued in place, hang the chandelier using hooks.
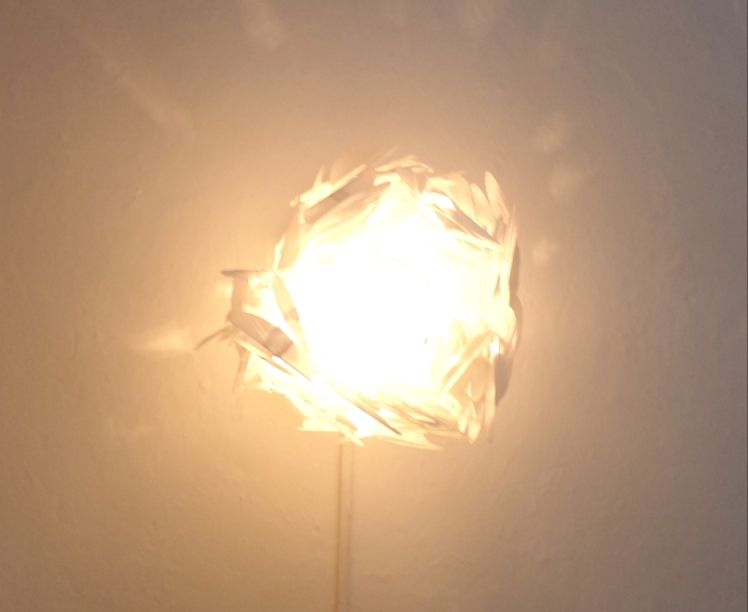
Here’s the final look.
And with the curtains drawn…
I just love the way light oozes out of the wax paper shells and creates a soothing ambiance.

So, if you have an ugly lampshade that you’re going to trash, do try DIY-ing this chic light fixture first. I’m sure you’d love it just as much I do!
For more ideas, check out this lamp makeover.


Till next time!


It’s soooo pretty!! 🙂
LikeLiked by 1 person
Thanks so much!
LikeLike
Sahar this is awesome! I’ve been trying to think of something I could do to cover up the ugly dome lights in our apartment… I bet this would work quite well! 🙂
LikeLiked by 1 person
I’m glad it helped Jamie! And I would love to see how it turns out. 🙂
LikeLiked by 1 person
Way cool !
Very similar to a ‘copiz shell’ chandelier I picked up in the Philippines 40 yrs ago
LikeLike
Thank you! Shell chandeliers were the inspiration and I’m so happy this DIY turned out like the real thing. 🙂
LikeLiked by 1 person
amazing Sahar!!! 🙂 its so pretty!
LikeLike
Thank you so much!
LikeLike
Wouldn’t the paper burn due to heat of the light bulb?
LikeLike
With a florucent light or an LED, the paper will not burn. 🙂
LikeLike
Genius idea! Love it, very creative. Saving for future crafting! Thanks for the great share!
LikeLiked by 1 person
Thanks, Naomie! Have fun crafting.
LikeLike
AMAZING !!!!!
LikeLiked by 1 person